
Face Detection is one of the most important fields in computer vision, it’s the first step for further face analysis and data manipulation. Through this post I will explain how to detect a face into an image using Python and Mediapipe, a computer vision library for Python.
I will divide this post into three stages: Obtain, Preprocess and Analyze.
Obtain
When working in a Machine Learning (ML) or Computer Vision project we need to follow a basic structure, commonly the first step is to obtain our data, so in this example I will use an image, for further face detection analysis.
Before continuing verify to have installed the next libraries using
pip install <library-to-install>.
- mediapipe
- opencv-python
- numpy
Let’s define our first code lines. In your working directory create a new
file called main.py, here we’ll define some basic functions.
import cv2
import numpy as np

def show_img(img: np.ndarray) -> None:
    """Show image in a window
    Args:
        img: image to be shown
    """
    cv2.imshow("image", img)
    cv2.waitKey(0)
    cv2.destroyAllWindows()


def main() -> None:
    """Main function
    """
    image_path = "img.png"
    img = cv2.imread(image_path)
    show_img(img)


if __name__ == "__main__":
    main()
Preprocess
In case of Mediapipe face detection the only preprocess we need to do is convert the image color before pass it to the model. Let’s create a function to get the prediction of the model for further use. We also need to add some lines to main function.
import mediapipe as np # Add this line next to previous imports

def get_prediction(img: np.ndarray, model: mp.solutions.face_detection.FaceDetection) -> list:
    """Get prediction of the model
    Args:
        img: image to be predicted
        model: model to be used
    Returns:
        prediction of the model
    """
    img_rgb = cv2.cvtColor(img, cv2.COLOR_BGR2RGB)

    return model.process(img_rgb).detections

def main() -> None:
    """Main function
    """
    # ... Our previous code

    with mp.solutions.face_detection.FaceDetection(
        model_selection=1, min_detection_confidence=0.5
    ) as face_detection:
        prediction = get_prediction(img, face_detection)
        print(prediction) # This line will print the predictions from the model
Analyze
Analyze is the stage in which we need to analyze our model output, for the case of face detection it is a list with face detection coordinates. The next task is to interpret this data, as part of analyze I’ll also include a function to add a rectangle in each face.
def draw_prediction(img: np.ndarray, coordinates: list) -> np.ndarray:
    """Draw prediction on the image
    Args:
        img: image to be drawn
        coordinates: coordinates of the prediction
    Returns:
        img: image with the prediction drawn
    """
    img_height, img_width, _ = img.shape # Get image dimensions

    for detection in coordinates:
        location_data = detection.location_data # Get location data of the prediction
        bbox = location_data.relative_bounding_box # Get bounding box of the prediction

        x1, y1, w, h = bbox.xmin, bbox.ymin, bbox.width, bbox.height # Get coordinates of the bounding box

        # Convert coordinates from relative to absolute
        x1 = int(x1 * img_width)
        y1 = int(y1 * img_height)
        w = int(w * img_width)
        h = int(h * img_height)

        # Adjust the region of interest if it exceeds the image boundaries
        if y1 < 0:
            h += y1  # Reduce the height by the excess amount
            y1 = 0  # Set y1 to 0 to start from the top

        if x1 < 0:
            w += x1  # Reduce the width by the excess amount
            x1 = 0  # Set x1 to 0 to start from the left

        if y1 + h > img_height:
            h = img_height - y1  # Reduce the height if it exceeds the image height

        if x1 + w > img_width:
            w = img_width - x1  # Reduce the width if it exceeds the image width

        # Draw bounding box on the image
        img = cv2.rectangle(img, (x1, y1), (x1 + w, y1 + h), (0, 255, 0), 5)

    return img

def main() -> None:
    """Main function
    """
    # ... Our previous code

    show_img(draw_prediction(img, prediction)) # Show image with prediction drawn
Don’t feel scared about the size of draw_prediction() function, the complexity
of this function is not elevated, just take your time to read the code and comments
and you will understand it. Remember to add the new line to main() function.
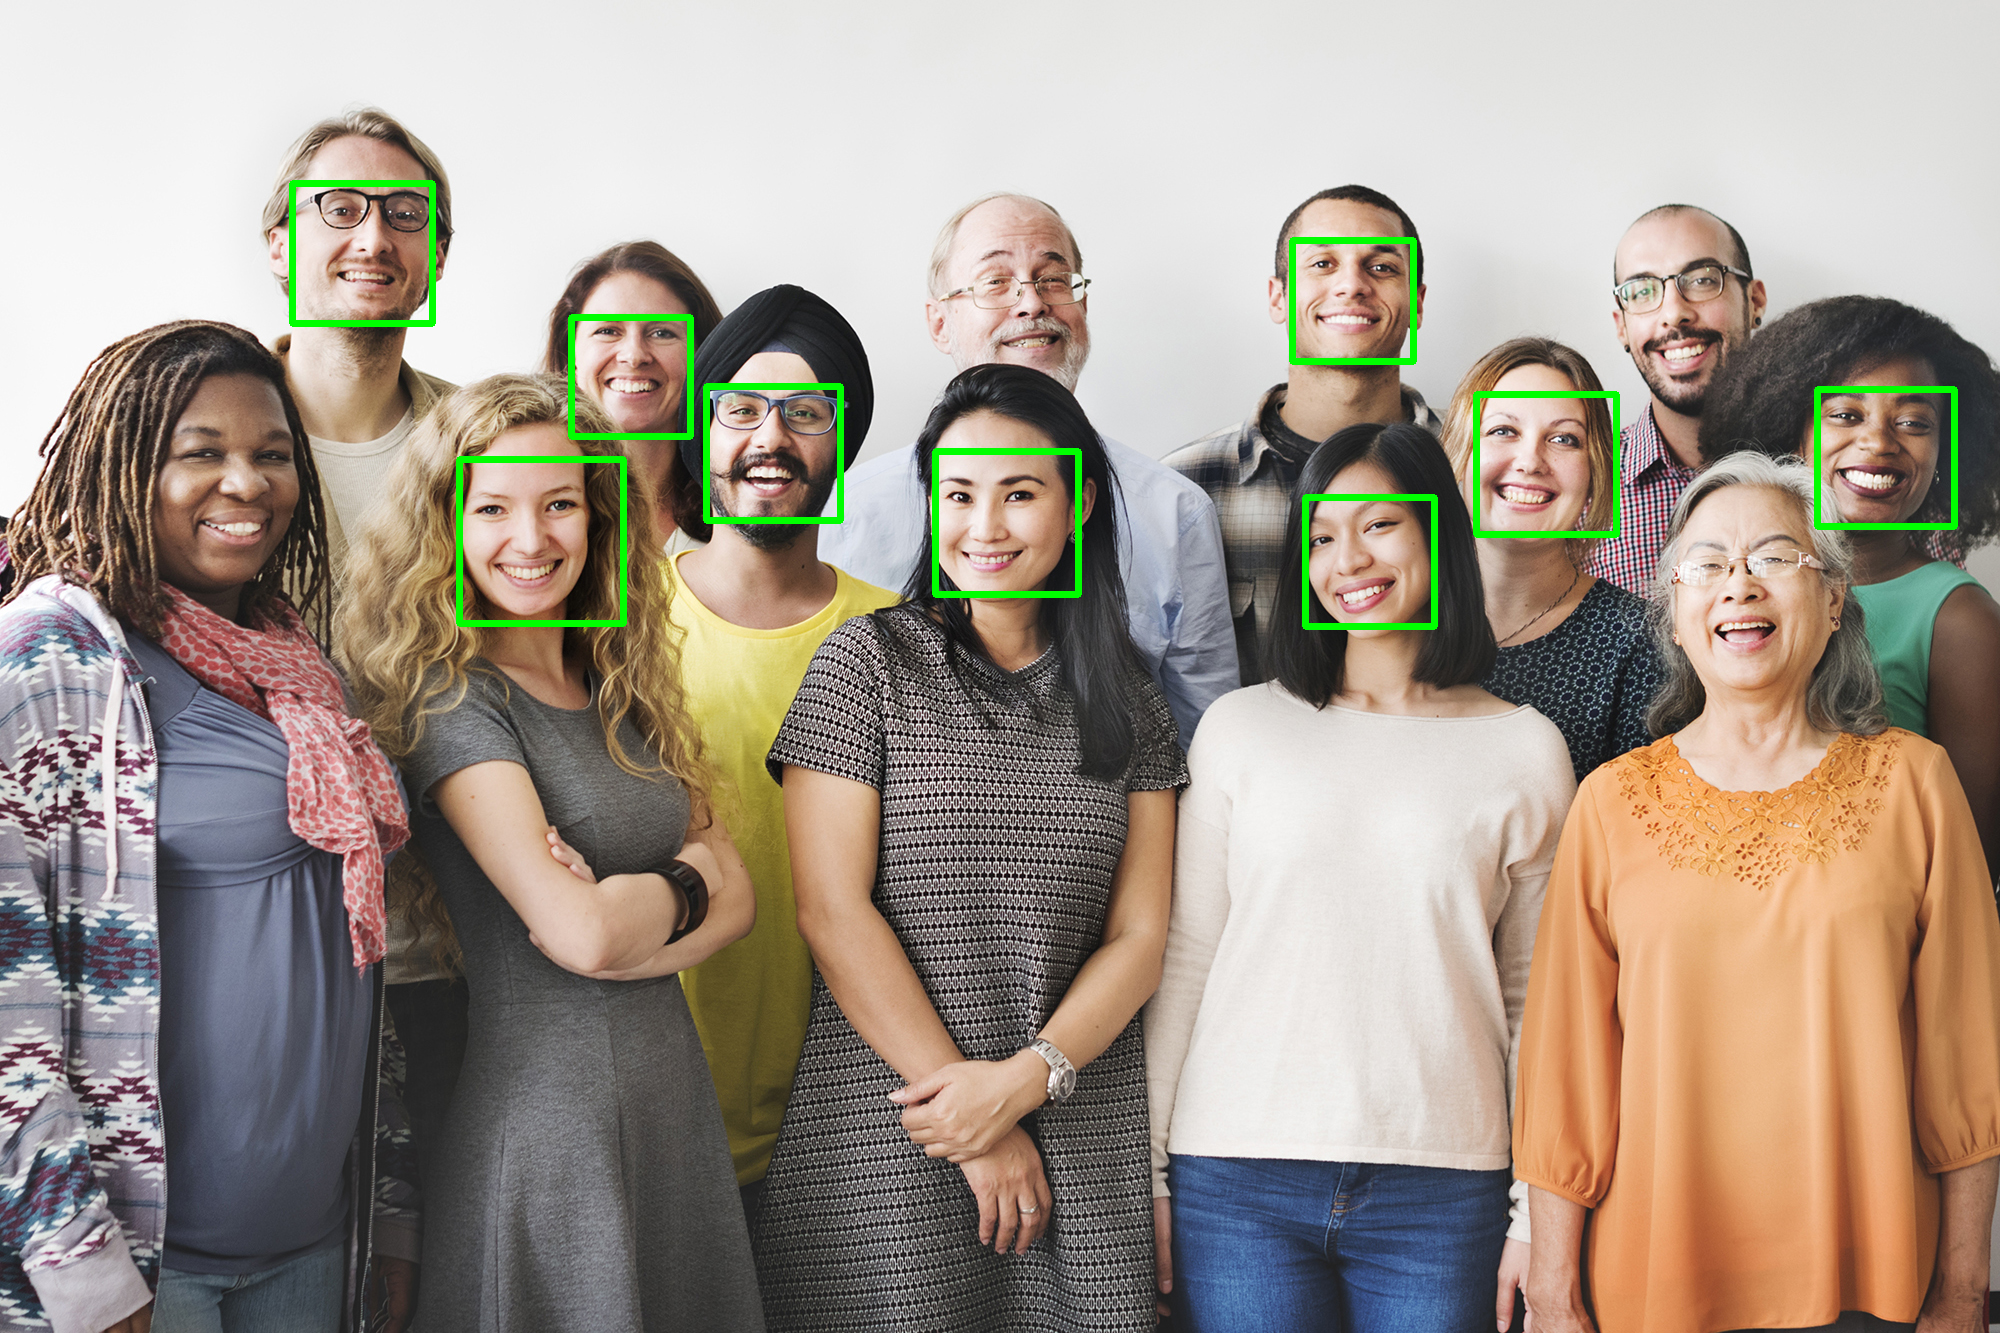
Result
Here is my test image after being passed to the model and draw the prediction:
Conclusion
In my experience working with face detection models, Mediapipe offers a good response time performance with an acceptable detection confidence. Mediapipe is also very good when working with real-time video, for example with a webcam.
I really recommend this model to beginners in face detection due to previous aspects and ease to use. If you are searching for a most powerful face detection model I recommend you to read about RetinaFace.
Final code
Here is the complete code of our face detection code, in case of needed.
import cv2
import numpy as np
import mediapipe as mp

def show_img(img: np.ndarray) -> None:
    """Show image in a window
    Args:
        img: image to be shown
    """
    cv2.imshow("image", img)
    cv2.waitKey(0)
    cv2.destroyAllWindows()


def get_prediction(img: np.ndarray, model: mp.solutions.face_detection.FaceDetection) -> np.ndarray:
    """Get prediction of the model
    Args:
        img: image to be predicted
        model: model to be used
    Returns:
        prediction: prediction of the model
    """
    img_rgb = cv2.cvtColor(img, cv2.COLOR_BGR2RGB)

    return model.process(img_rgb).detections


def draw_prediction(img: np.ndarray, coordinates: list) -> np.ndarray:
    """Draw prediction on the image
    Args:
        img: image to be drawn
        coordinates: coordinates of the prediction
    Returns:
        img: image with the prediction drawn
    """
    img_height, img_width, _ = img.shape # Get image dimensions

    for detection in coordinates:
        location_data = detection.location_data # Get location data of the prediction
        bbox = location_data.relative_bounding_box # Get bounding box of the prediction

        x1, y1, w, h = bbox.xmin, bbox.ymin, bbox.width, bbox.height # Get coordinates of the bounding box

        # Convert coordinates from relative to absolute
        x1 = int(x1 * img_width)
        y1 = int(y1 * img_height)
        w = int(w * img_width)
        h = int(h * img_height)

        # Adjust the region of interest if it exceeds the image boundaries
        if y1 < 0:
            h += y1  # Reduce the height by the excess amount
            y1 = 0  # Set y1 to 0 to start from the top

        if x1 < 0:
            w += x1  # Reduce the width by the excess amount
            x1 = 0  # Set x1 to 0 to start from the left

        if y1 + h > img_height:
            h = img_height - y1  # Reduce the height if it exceeds the image height

        if x1 + w > img_width:
            w = img_width - x1  # Reduce the width if it exceeds the image width

        # Draw bounding box on the image
        img = cv2.rectangle(img, (x1, y1), (x1 + w, y1 + h), (0, 255, 0), 5)

    return img


def main() -> None:
    """Main function
    """
    image_path = "img.png"
    img = cv2.imread(image_path)

    with mp.solutions.face_detection.FaceDetection(
        model_selection=1, min_detection_confidence=0.5
    ) as face_detection:
        prediction = get_prediction(img, face_detection)

    show_img(draw_prediction(img, prediction)) # Show image with prediction drawn

if __name__ == "__main__":
    main()